Friday 14 May 2010

Altering a vintage dress


Long time readers of this blog will remember that back in November 2008 (!!!!), Miss T, my lovely next door neighbour, very kindly gave me a bag of clothes which had belonged to her grandma, Gertie, who had just turned 100!     As you can see, this dress, although it dates I would imagine, from the 70's era, is in very good condition - almost new infact!  

The dress is unlined, with just a facing at the top which makes it a lovely cool summer style dress.


Unfortunately, before I realised that this dress would probably fit me, I was clearing out my stash, making things tidy and chopping up old clothes so that the resulting fabric pieces would fit neatly into a folded pile ..... and so I cut through the shoulders of this dress and then decided to try it on ... doh!


..  Naturally, thanks to the laws of sod, it was a perfect fit and considering that Gertie was at least 90 the last time she wore this dress - more than twice my age - she must have been in pretty good shape!  I decided to try to salvage the dress in order to wear this summer because I love the fabric which is quite a heavy weave cotton - perhaps with a bit of linen mixed in, and the style is perfect for me - I'm not a flouncy frilly type of girl and this straight a-line style suits me.

So, here is the dress with frills off, and ready for a bit of 'modernisation'.


I mended the shoulders with some white linen bias binding, and after taking in the side seams by a centimetre each side to compensate for the lack of sleeve, I also bound the sleeve edges with the same binding.


In my stash I found some vintage stretch lace in a lurid colour of green - very 70's!  


3 yards was just enough to finish the new hemline, and put a little ruffle around the neck..


Et Voila!  One new old dress, finished with vintage trim.


It was much more difficult to take a picture of me in it with my phone!


Wednesday 5 May 2010

The McCalls 5525 coat - progress


I am SERIOUSLY impressed with this coat pattern!  I am so impressed that i'm going to make the trenchcoat too.. 

The sizes actually do correspond to the sizes printed on the packet (unlike some patterns I could mention), the instructions are clear - there are no ambiguities, the make-up is straight forward easy-peasy-lemon-squeezy, and the finished article fits like a dream - no alterations required whatsoever.  This is a first for me!


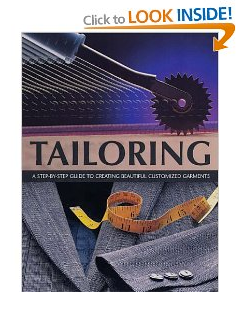
I did as Gertie said and applied some 'light tailoring' using my trusty tailoring book, also with easy to follow instructions:
You can see how the pad stitching (I know, don't laugh at my pitiful efforts) really does shape the collar. I have interfaced (and stitched) the under collar, although the pattern says that you must interface the top part of the collar.


I applied a back stay and underarm re-inforcements, using plain, stiff, calico - the front was also interfaced with stiff calico. (Note to self : must acquire pinking shears!).


And, again using my trusty book, and Gertie's sleeve setting vlog, I used a peice of hair canvas to set the sleeve.  This did the double job of providing a little support for the sleeve head.


The sleeve went in like a dream - no problems at all .. not even cause for one little tiny swear word!


The lining goes in very easily - one thing you might like to know if you decide to make this, is that the buttons and button hole placement markings, only need to be marked on the facings of the coat.  This saves a little time!  I am really really pleased with the fabric combination I have here, and the lining is so silky smooth and soft that the coat has an extremely luxurious feel to it..


I love the collar on this coat!  So very late 50's / early 60's  don't you think?  The finishing touch is topstitching. It makes such a difference to the final look of a hand made garment. I stitched right under the collar too which isn't in the instructions.  The way the collar it is attached means that the collar stays down better if stitched down.

The only thing left to do, is find some buttons.  I looked through my vintage button stash, but havent anything quite right, so I will either use self cover buttons, or I will take a trip to a vintage store in town to see if there is anything appropriate there.  

If you want the whole story on this coat/pattern, then please click HERE.