Monday, 28 February 2011

Future plans and skirt revision


Thank you all so much for the lovely and kind comments on my last post, all very much appreciated and gratefully received.  It is indeed extremely exciting, not least because i've spent the last 40 years wondering just what it is that I would like to do ... and now I know!  Hurray!  I wish it hadn't taken quite so long, but I do beleive in fate and the fact that everything has it's time and place, and even pace .. I am feeling very positive and I'm also looking forward to more blogging time!

I'm continuing with my skirt making 'series' which never got past the pencil stage last year!  Never fear that I have forgotton though, because I have now drawn the diagrams for my high waisted pencil skirt, with belt attachment and with lining based on a technique I found in Threads magazine.  If you want to make your own skirts, here are my first three tutorials on how to get to the pencil skirt stage:

I hope to post the next tutorial this week sometime so watch this space!


Wednesday, 23 February 2011

A historical moment


I have resigned from the day job .. HURRAH!!!!

I have decided to focus 100% on Sew Curvy

I have new supplies for the shop and big expansion plans!

and ...

I am going to start making corsets for a living.
I am going to become a full time corsetiere!

Isn't it exciting?!

I have spent years consternating over suitable names for such a business, and suddenly, the other day I settled on one I'd never thought of before and quickly bought up the  domains.

I have so many ideas my head is BURSTING!

I am learning Dreamweaver in the final weeks of the day job and so should be able to build and manage my own websites which in itself is an exciting design project.

seeds have been planted
On the home front, the greenhouse and all the pots have been cleaned and de-cobwebbed, the compost is ready, the seeds have been bought (from The Real Seed Catalogue), the windowsills are laden with pots, and my chickens are laying again!

Everything is so exciting!!

Monday, 7 February 2011

Laughing Moon Dore corset


This is what i'm working on at the moment.  Not a corset but a set of techniques.


If I told you the techniques i'm working on now, i'd have to kill you.


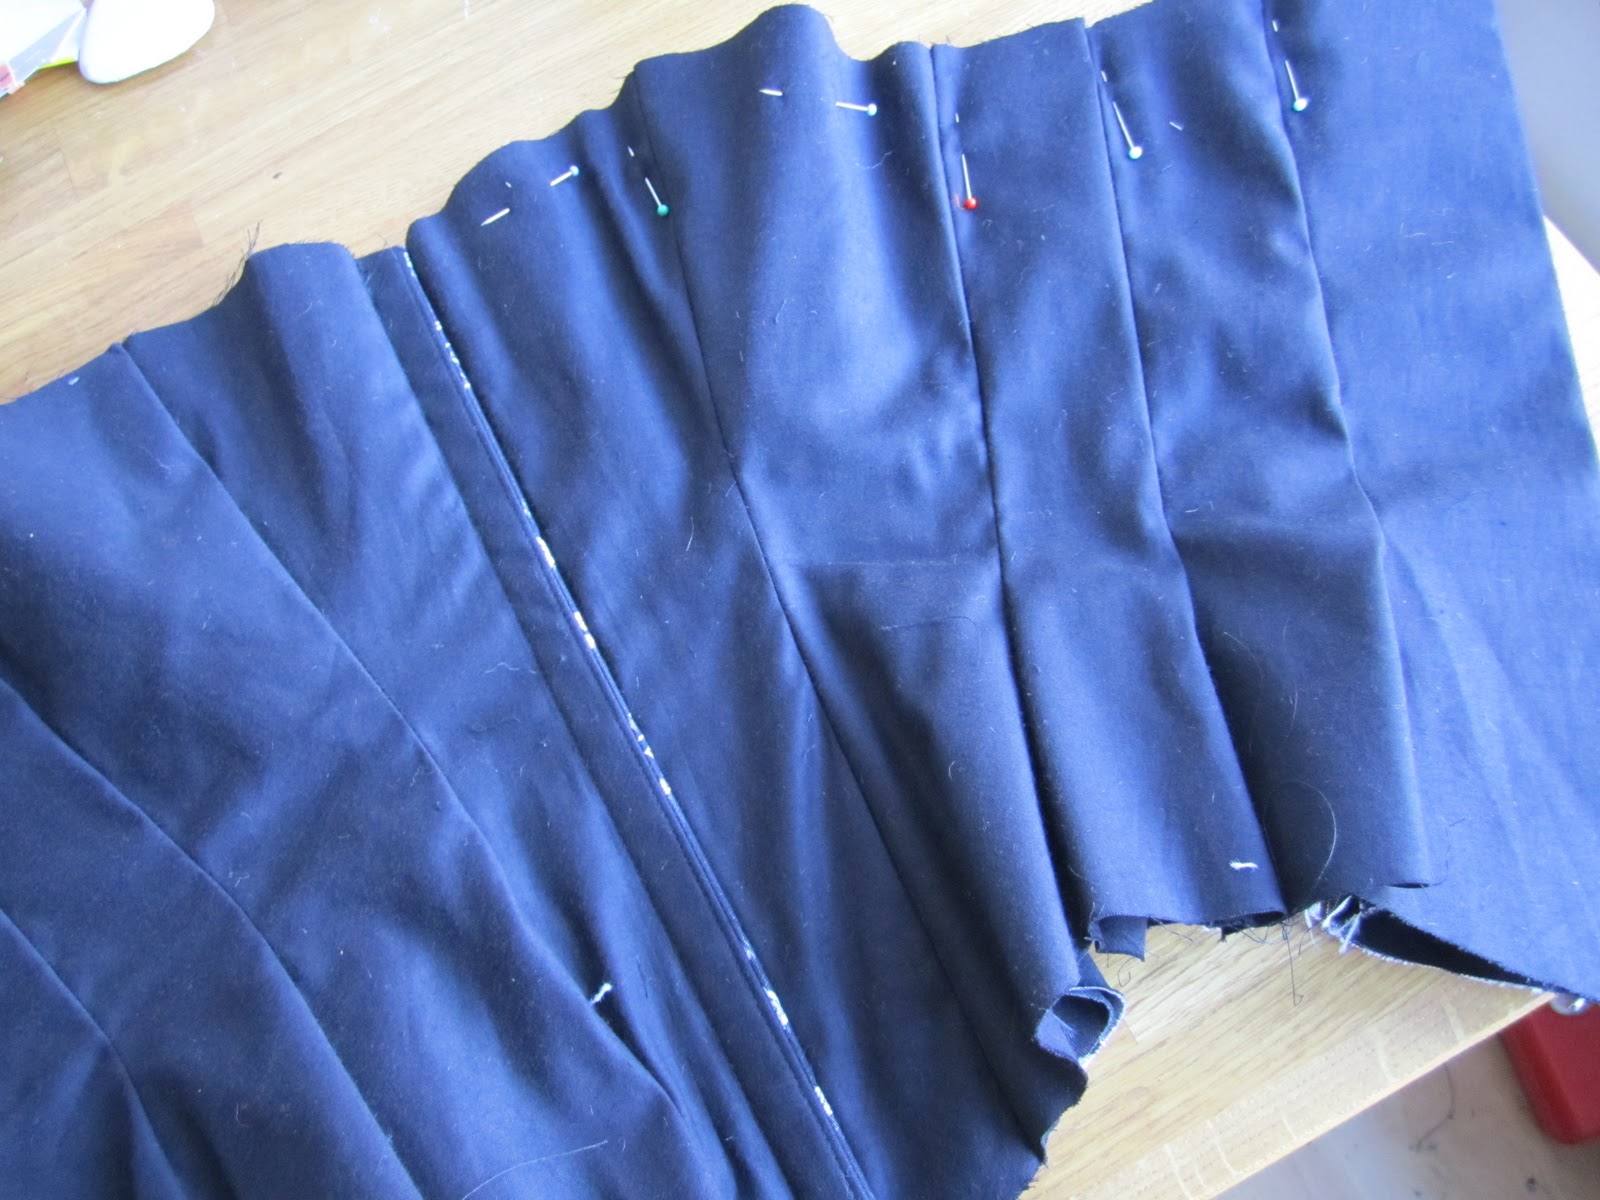
I'm particularly pleased with the way the front panels line up quite perfectly


And i'm extra pleased at the way the lining - a soft cotton sateen - has turned out.  This is a three layer corset, made from 2 layers of coutil and a floating lining.

As you know, I'm writing a beginners guide to corsetry for Rainbow Disks.  It will be published in the autumn, in time for Christmas and I want it to be THE corset book to get.

Tell me ... If you were making a corset for the first time ever, what do you think you would like to know?


Thursday, 3 February 2011

Pencil Skirts

I've been making pencil skirts with different features.  Both are high waisted because I find these comfortable - and they happen to be fashionable now.  Both are winter skirts - heavyweight and lined, both are boot and shoe friendly.

This one is made from greenish cord with 6 panels, pockets and a top bodice section.


This one is made from a wool mix fabric with an attached belt which makes the figure look super curvy.  The buckle came from a charity shop belt which I bought for 50p.  

Charity shops - fabulous source for notions which are expensive new.


This skirt used a new lining technique which can be found in issue 150 of Threads if you have it.

I'll be demonstrating in the near future,  how to make both of these skirt patterns expanding on 


Friday, 28 January 2011

How to make a custom bodice block

I've been meaning to post these pages from my "Odhams Encyclopeadia of Needlecraft" for ages.  It was published sometime in 1954 so there are no copyright issues now.

I LOVE to look through it as much for the language used, as the techinques described.

Here then, is an illustrated method of making your own custom body block (sloper).   I hope to be able to go through some basic manipulation principles with you which will show you how to change the position of darts for fit and style at various points throughout the year, and also, this book includes patterns for lots of lovely garments, based on these blocks, including a bra pattern.

Making your own dress block and then understanding how it relates to all other patterns is a brilliant way to understand how clothes are designed and constructed, it will help (as it did me) no end with commercial patterns too - this is basically the mechanism by which all patterns work.

These pages are  all very self explanatory,  click on the pics to make them larger - I hope you enjoy reading them as much as I do!


Tuesday, 25 January 2011

Restoring a Vintage Sewing Machine.

Have you ever looked at an old vintage sewing machine which is perhaps a bit rusty and thought "ooh I'd love that, if I had time to clean it up" - imagining that it might take a team of magic pixies and a whole year's worth of elbow grease to do..?

Well .. Here's how you can do it without the pixies and only a weekend's worth of low grade elbow grease.  With just a few household 'substances' you can have a very old, very beautiful machine working as well as it was the day it left the factory.  So without further ado, heres is

Mrs Marmalade's definitive guide to Vintage Sewing Machine Maintenance and Restoration!

You've all met Wilma before .. she's 120 years old and has for the last 22 years, lived in my loft.  She was in a bad state when I rescued her from Oxfam but deteriorated a little more over the years.  I thought her sewing days were over.


Poor Wilma has a yellowed bed and rusty parts but she is still young inside, all her bits work as they should.  After surfing around a few sites looking for info about machine maintenance, I figured I could try to restore Wilma.

The 'traditional' method seems to be by soaking the entire machine in Kerosene and then scrubbing and rubbing the thing clean and then lots of polishing preferably with a Dremel.

Well I don't have a Dremel, and Mr Marmalade won't have Kerosene anywhere near the place - it is ridiculously dangerous - much more flammable than petrol, it stinks, it is messy ..yuk yuk..

So instead of Kerosene, this is what I used - I bet you have the same stuff in your cupboards:


Here we have, a can of coke (most important), car polish, metal polish, dusters, wire wool and, not pictured, a toothbrush, some Barkeepers Friend and a camera.

First of all make sure you take plenty of 'before' shots, both distant and close up - you really wont believe your eyes and you wont remember how 'bad' she was before.


Keep taking pictures as you  dismantle your machine, lots of pictures, make labels of all your bits, and take pictures of said bits, on the labels.


If there are multiple parts which fit together, take a picture of the thing before you dismantle it, take pictures as you dismantle it, and take a picture of the parts in the order they should be put back when dismantled - you can never take too many pictures.


If your metal bits are rusty, take most of the rust off by rubbing the part with some grade 00 wire wool - dry.  It will come off quite easily.  If the rust is stubborn, add a bit of WD40.   If there are screws that you can't undo, use WD40 to loosen them.

I couldn't get this part off so I just polished it up with wire wool and Peek
Take off the face plate and the back plate and clean the insides as well as possible with a duster/toothbrush/dry paint brush/air can - don't get the insides wet.  If there is alot of gunk in there, use WD40 to loosen and clean it.

Don't forget the underside - give it a good old clean with a dry cloth and some WD40 if necessary.  The most important thing is to never get the insides wet with water as this will cause rust in unreachable places.


When you were little did you ever do the coke and penny experiment?  Put a dirty penny in coke over night and the next morning it is shiny and new?


A similar principle applies to your metal sewing machine parts - when they are as de-rusted as possible, soak them in the coke overnight.  Do not soak painted parts in coke! Only metal.    *Please note, only soak your metal parts if all there is no chrome present!!  Obviously Wilma started off life with chromed parts but after 120 years there is no chrome left so these parts are back to the bare metal.

While they are soaking you can get on with the body.  I scrubbed Wilma on the outside with washing up liquid and a toothbrush, and rinsed her with a damp cloth - this wont get all the dirt off but it will shift most of it.  If you have really really stubborn dirt, use a 'bug remover' for cars - available in car part shops or Halfords.  If you are in doubt about what you use to clean the body, test a little area first, at best, you may silver the decals, and at worst you may rub them off or dissolve them!  Car cleaning products are generally 'kind' to sewing machines.  You may end up with patches on the machine which look a little brown - don't worry about them.

When you have washed and dried the body, and have dusted and de-gunked the insides, give the machine a liberal dose of sewing machine oil on all the moving parts and turn the wheel so that the oil gets in all the nooks and crannies.  Oil some more.

On the outside, you can polish the body using T-cut, this will do four things 1. remove deeply ground in grime which can't be budged by soap alone,  2) restore the blackness in the colour,  3) give a lovely shine and 4) ...


Even if by chance you have accidentally scratched your paintwork with wire wool, T-cut will make them good.  It's like a miracle!!

these have just been removed from the coke .. as you can see they still look dirty, but the dirt is really loose now and scrubs off easily
The next day, when your metal parts have soaked in coke, take them out one by one and deal with them by scrubbing again with wire wool to remove the now loose dirt, then apply a little Barkeepers friend.   This finishes off the job of the coke, removes really awkward stains and adds a little bit of shine.  Rinse whilst still 'polishing' with the wire wool under running water.


Dry the parts and polish with Peek or Brasso (I prefer Peek).  The metal polish buffs up the metal but also adds a protective coating which will give the metal parts a new lease of life and protect them from immediate rust attack.

You might discover some hidden gems ...


Reassemble your sewing machine bit by bit as you polish your metal parts.  This is where your photos will come in handy - even though it hasn't been long since you dismantled, you will be surprised at how quickly you might forget which screw goes where!

When done,  stand back and admire your work!


There are many more pictures over at my Flickr Stream right HERE.


Friday, 21 January 2011

Sizing and anthropometrics

I wrote an article on here a while ago which covered the topic of Anthropometrics, and i'm damned if I can find it now, but I am inspired to revisit the subject after listening to an article on Womens Hour BBC R4 yesterday with Gemma Seager, fellow blogger at "Retrochick" and a chap called Ed Gribbin, president of Alvanon, a company which advises clothes retailers on size and shape of people.


Anthropometrics, the study of human measurement, is obviously a topic of great interest to the fashion trade and anybody else who uses or cuts dress patterns and makes clothes.  I find it absolutely fascinating!  The subject covers amongst other things,  human proportion and therefore clothes measurements .. ie: a human head will fit into a human leg about 7 times  (fashion models who embody the 'ideal' standard of human perfection are known in the trade as "8 headers" because they have extra long legs!), the distance from waist to upper upper hip is 10cm and from waist to lower hip is 20cm,  the bust typically has an 8cm radius etc.,

Though the study of anthropometrics has existed for centuries, Standard sizing in the clothing industry was only 'discovered' by the Guild of Military Tailors during WW2 when they noticed a certain 'uniformity'  in the clothes they were making for male and female soldiers and military personnel.  The 'standard' sizing in use today as the model for all other sizing charts, is still based on those dimensions from the 40's when women, men and children were a very different shape and size to their counterparts today.

Many high street clothing brands make up their own 'standard' sizing building clothes which conform to a certain body shape and a certain demographic - a teenage size 12 is not going to be the same as an elderly size 12, or a middle age size 12.  The trouble is (apparently) that clothes brands don't find it important to mention which demographic they are aiming for and so clothes shopping for the average woman can turn into a black pit of pain, panic and horror after the first three changing rooms! 

In practice, for me as a typically 'curvy' female who's shape has not altered that much over the last 20 years (notwithstanding the recent middleaged spread), this means that if I shop in Next and M&S - aimed at the post 20's-middle age market, I know I'm a size 8 in bottoms and a size 12-14 in tops, but in Jane Norman - a shop aimed at the teenage and early 20's market,  I am a size 14 in everything.  I can therefore go into any of those shops, pick something up without trying it on, and know that it will fit.  

On the other side of the coin, I  know that Levi jeans never fit  because their target demographic is 'twig' - it's taken me 20 years to deduce that fact.  Similarly, Karen Millen and Coast (owned by the same company) only make clothes for tiny flat chested pixies - deduction time = 5 minutes.


The same goes for more 'intimate' apparel.  I know that the Bravissimo style of bra sizing suits me.  I also know that bras sold by other retailers who conform to that method of sizing, will fit me, and I know who they are.  M&S underwear makes me look like an ugly pink overflowing sausage whatever size I choose.

Confusion continues to reign at home when I am making my own clothes, in modern dress patterns I am a size 12, in vintage dress patterns, a size 18.

In short, womens sizing is like womens hormones ..  All over the place! You have to know how to deal with them in order to avoid a life of despair!

So it was with interest I listend to Womens Hour on Radio 4 yesterday to hear talk of a proposed new system of standard sizing for the high street based on modern womens size AND SHAPE.   Actually Queen Bravissimo thought of that first - here is the Bravissimo sizing chart:

At first I thought "goodlord! how complicated is it going to be just to buy some clothes?" but after some contemplation, I think it will be a good thing IF retailers ensure that there is plenty of stock for all - ofcourse it could mean that their stock increases three fold if the industry advisors have their way - they suggest 3 sub catergories:

straight - for the a 'boyish' figure
moderately curvy -  60% of women fall into this catergory
quite curvy - hourglass figure and mathcing the original standards of the 40's

Will retailers clothing policies become more transparent - will they want to encompass all or just one type of fit? 

The question is

Will this sizing system make our lives better or worse?

I am not so sure it is the answer - there are so many variables to shape and size in our modern age that I wonder if it is possible to find a definitive standard that fits all.  It was this very problem which put me off shopping for life and turned my attention to the sewing machine ..

What do you think Readers?